• Environments
  • Blog
  • Custom Finishes
  • Contact
  • About
Menu

DeBari Home

506 North Vandeventer Avenue
Fayetteville, AR, 72701
479-221-1545

Wilson Park

Fayetteville, Ar 72701

Info@Debarihome.com

DeBari Home

  • Environments
  • Blog
  • Custom Finishes
  • Contact
  • About

5 Steps to the Perfect Playroom!

May 21, 2018 Jessica DeBari
Green Palette

Green Palette

1. Color

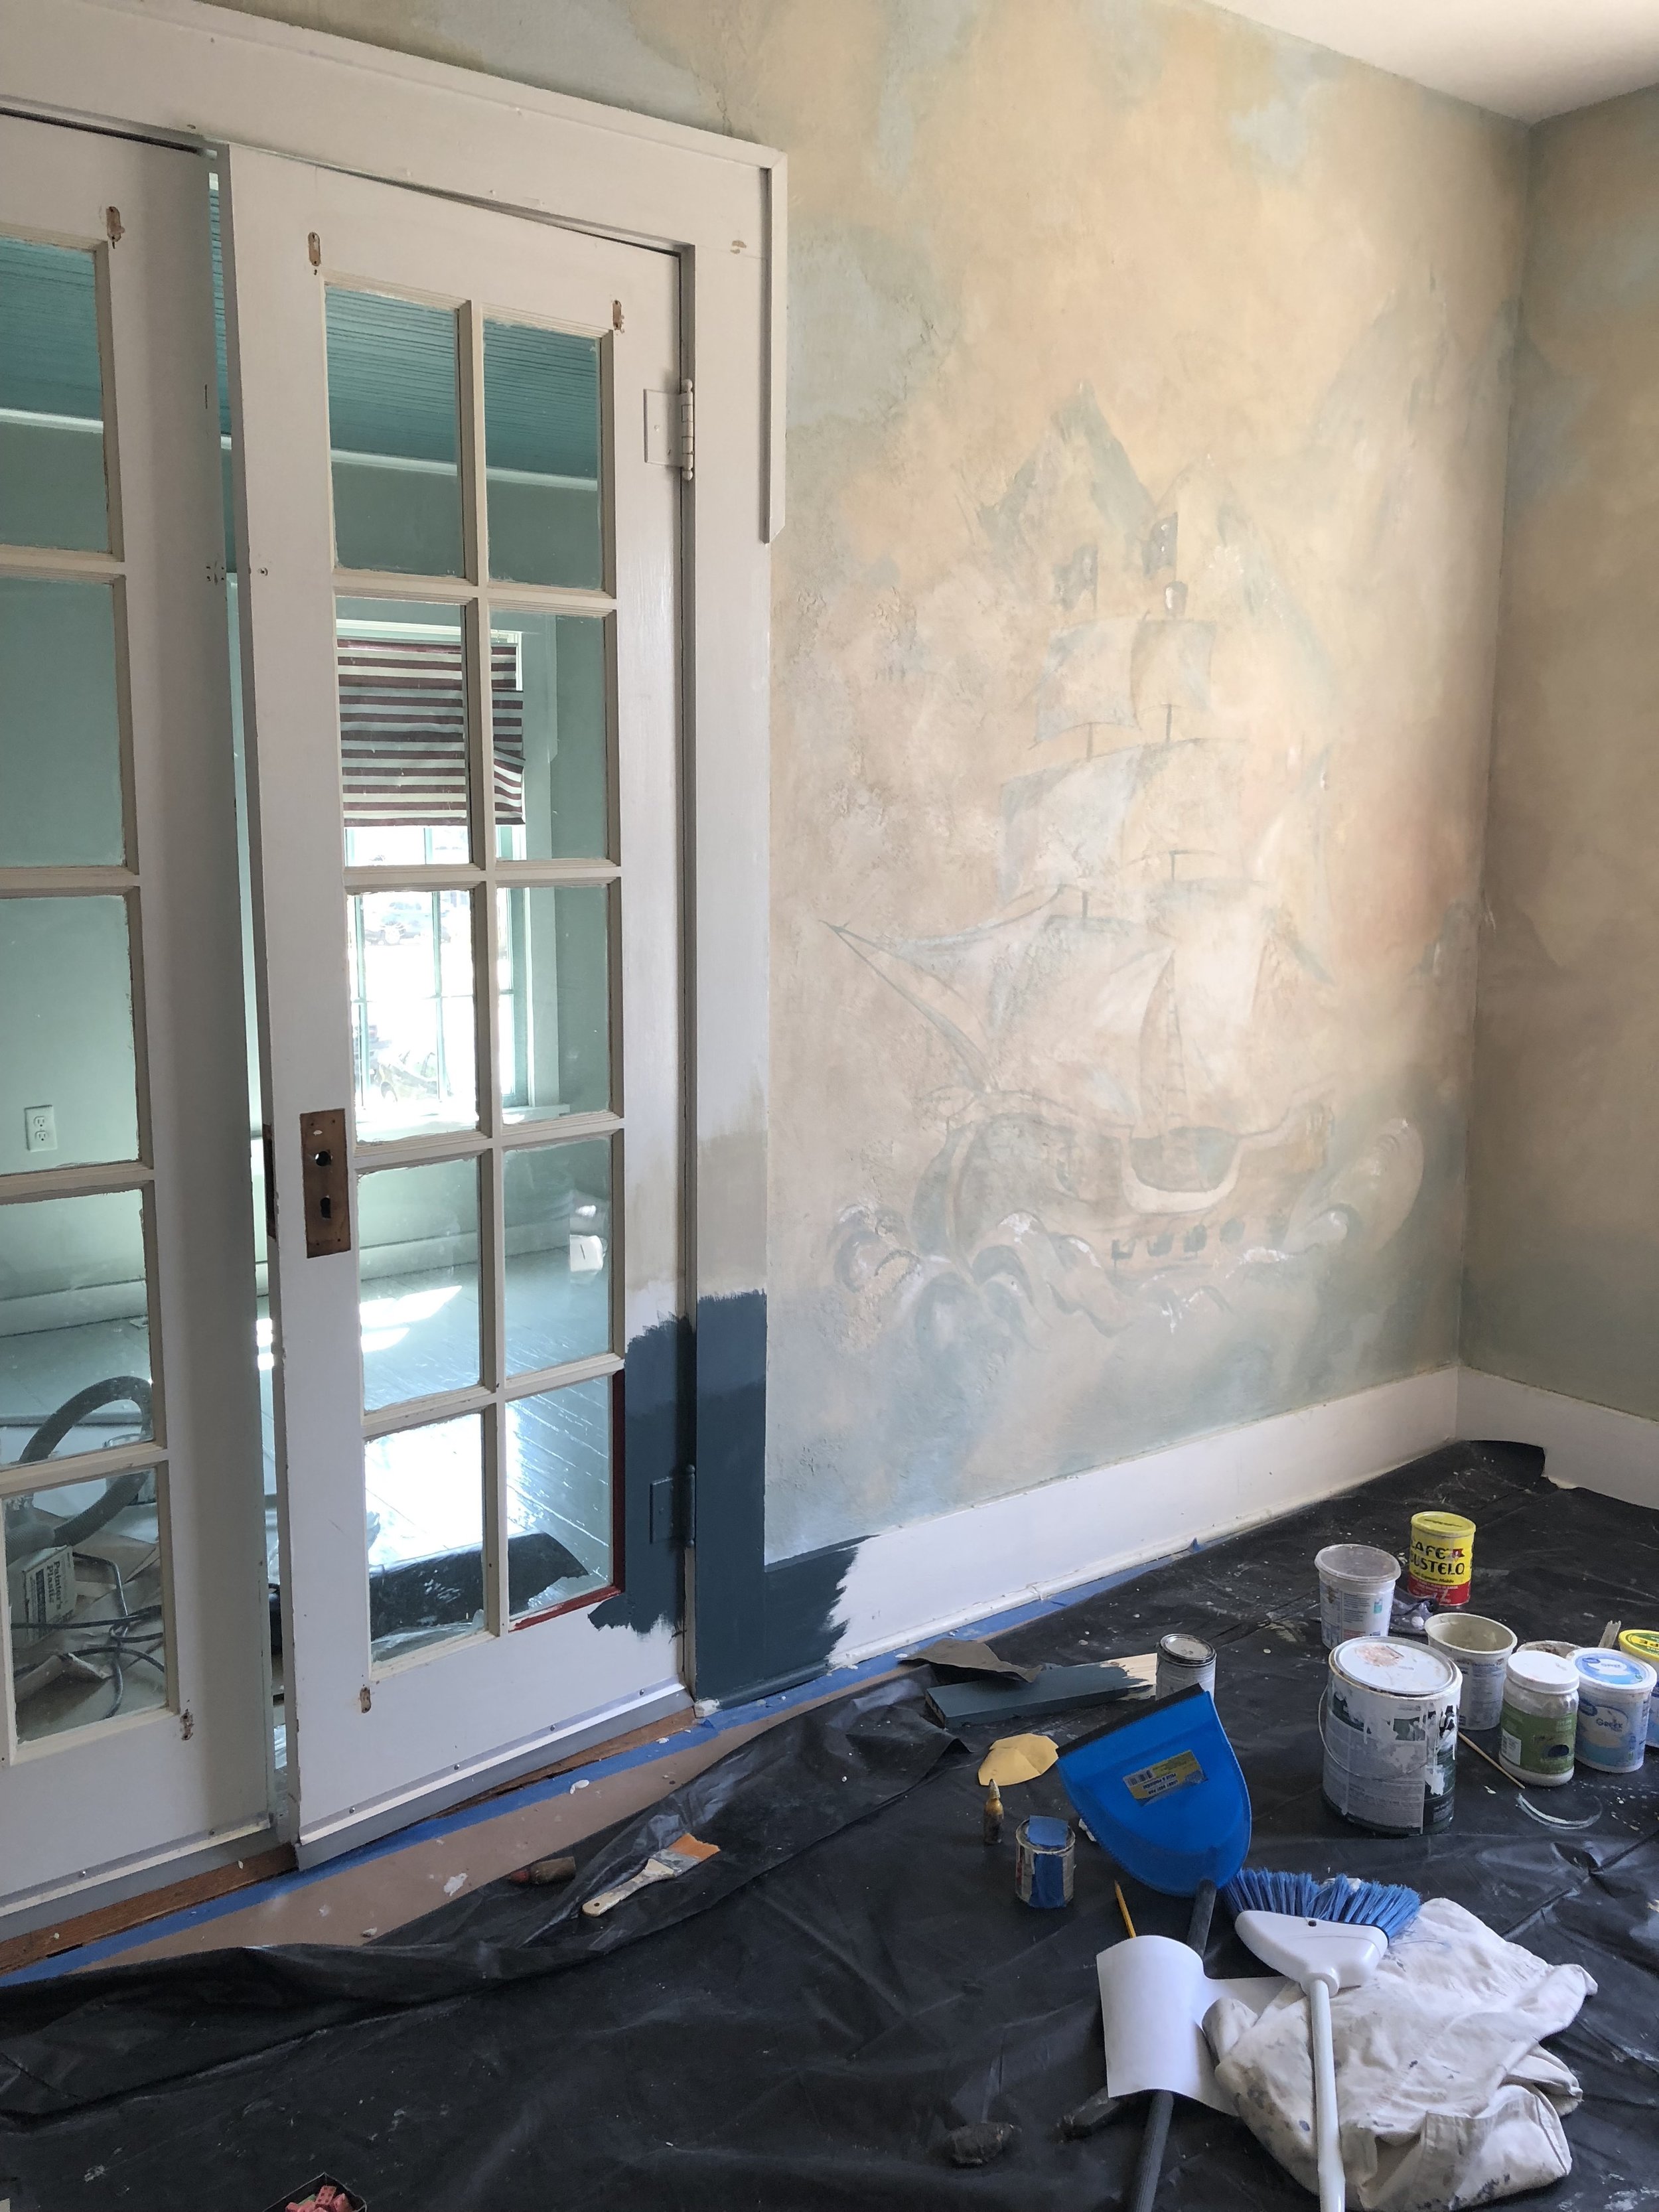
Palette always needs to be considered first when planning a playroom.  The items you buy need to fit into a palette so you should consider the colors of the furniture you have or want when picking wall and trim colors.  I am a firm believer that there should be an element of fun when picking "kid" colors.  Bright turquoise on the windows in this room plays off the reds in the window treatments to create great color energy.  We had a garden theme in mind for this room, and so the palette is an array of greens, with a light neutral green on the walls, turquoise on the windows, light blue grey on the floor (with bright green grass of course) and a dark teal on the ceiling.  The overall effect is very calm, it really does recreate the feeling of being in a shaded garden.  

Complementary Colors, Red and Green

Complementary Colors, Red and Green

2. Storage

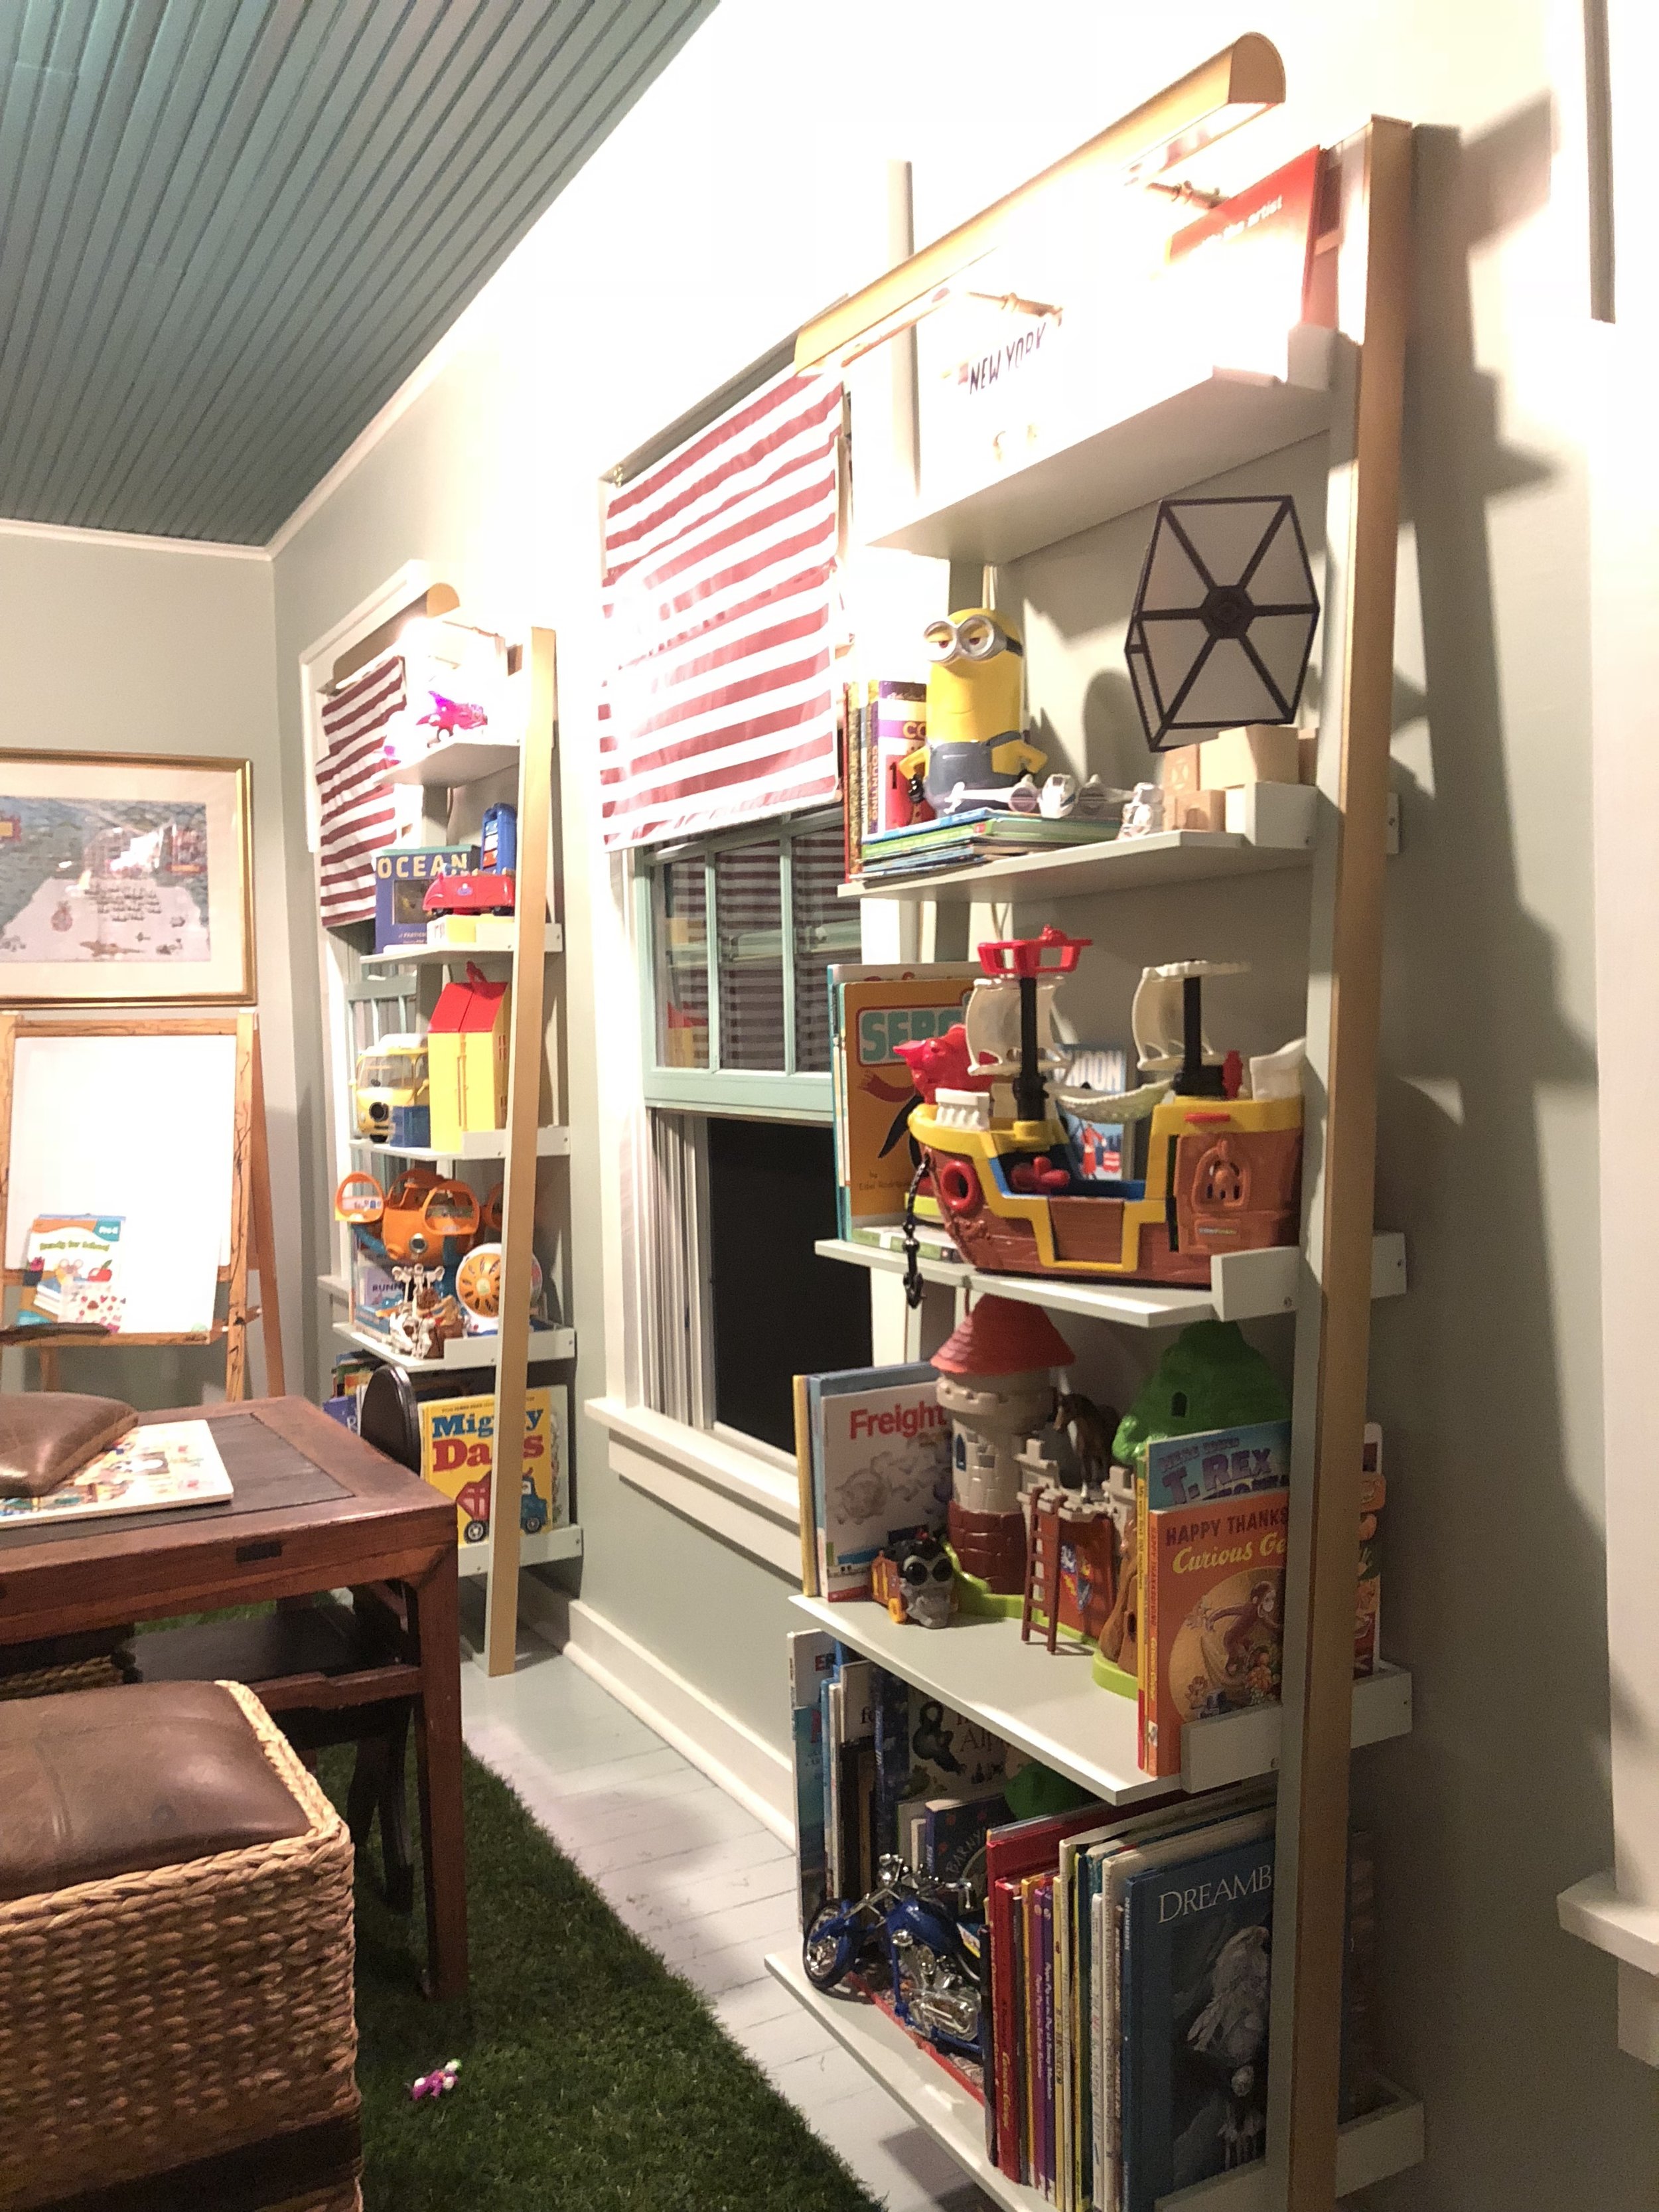
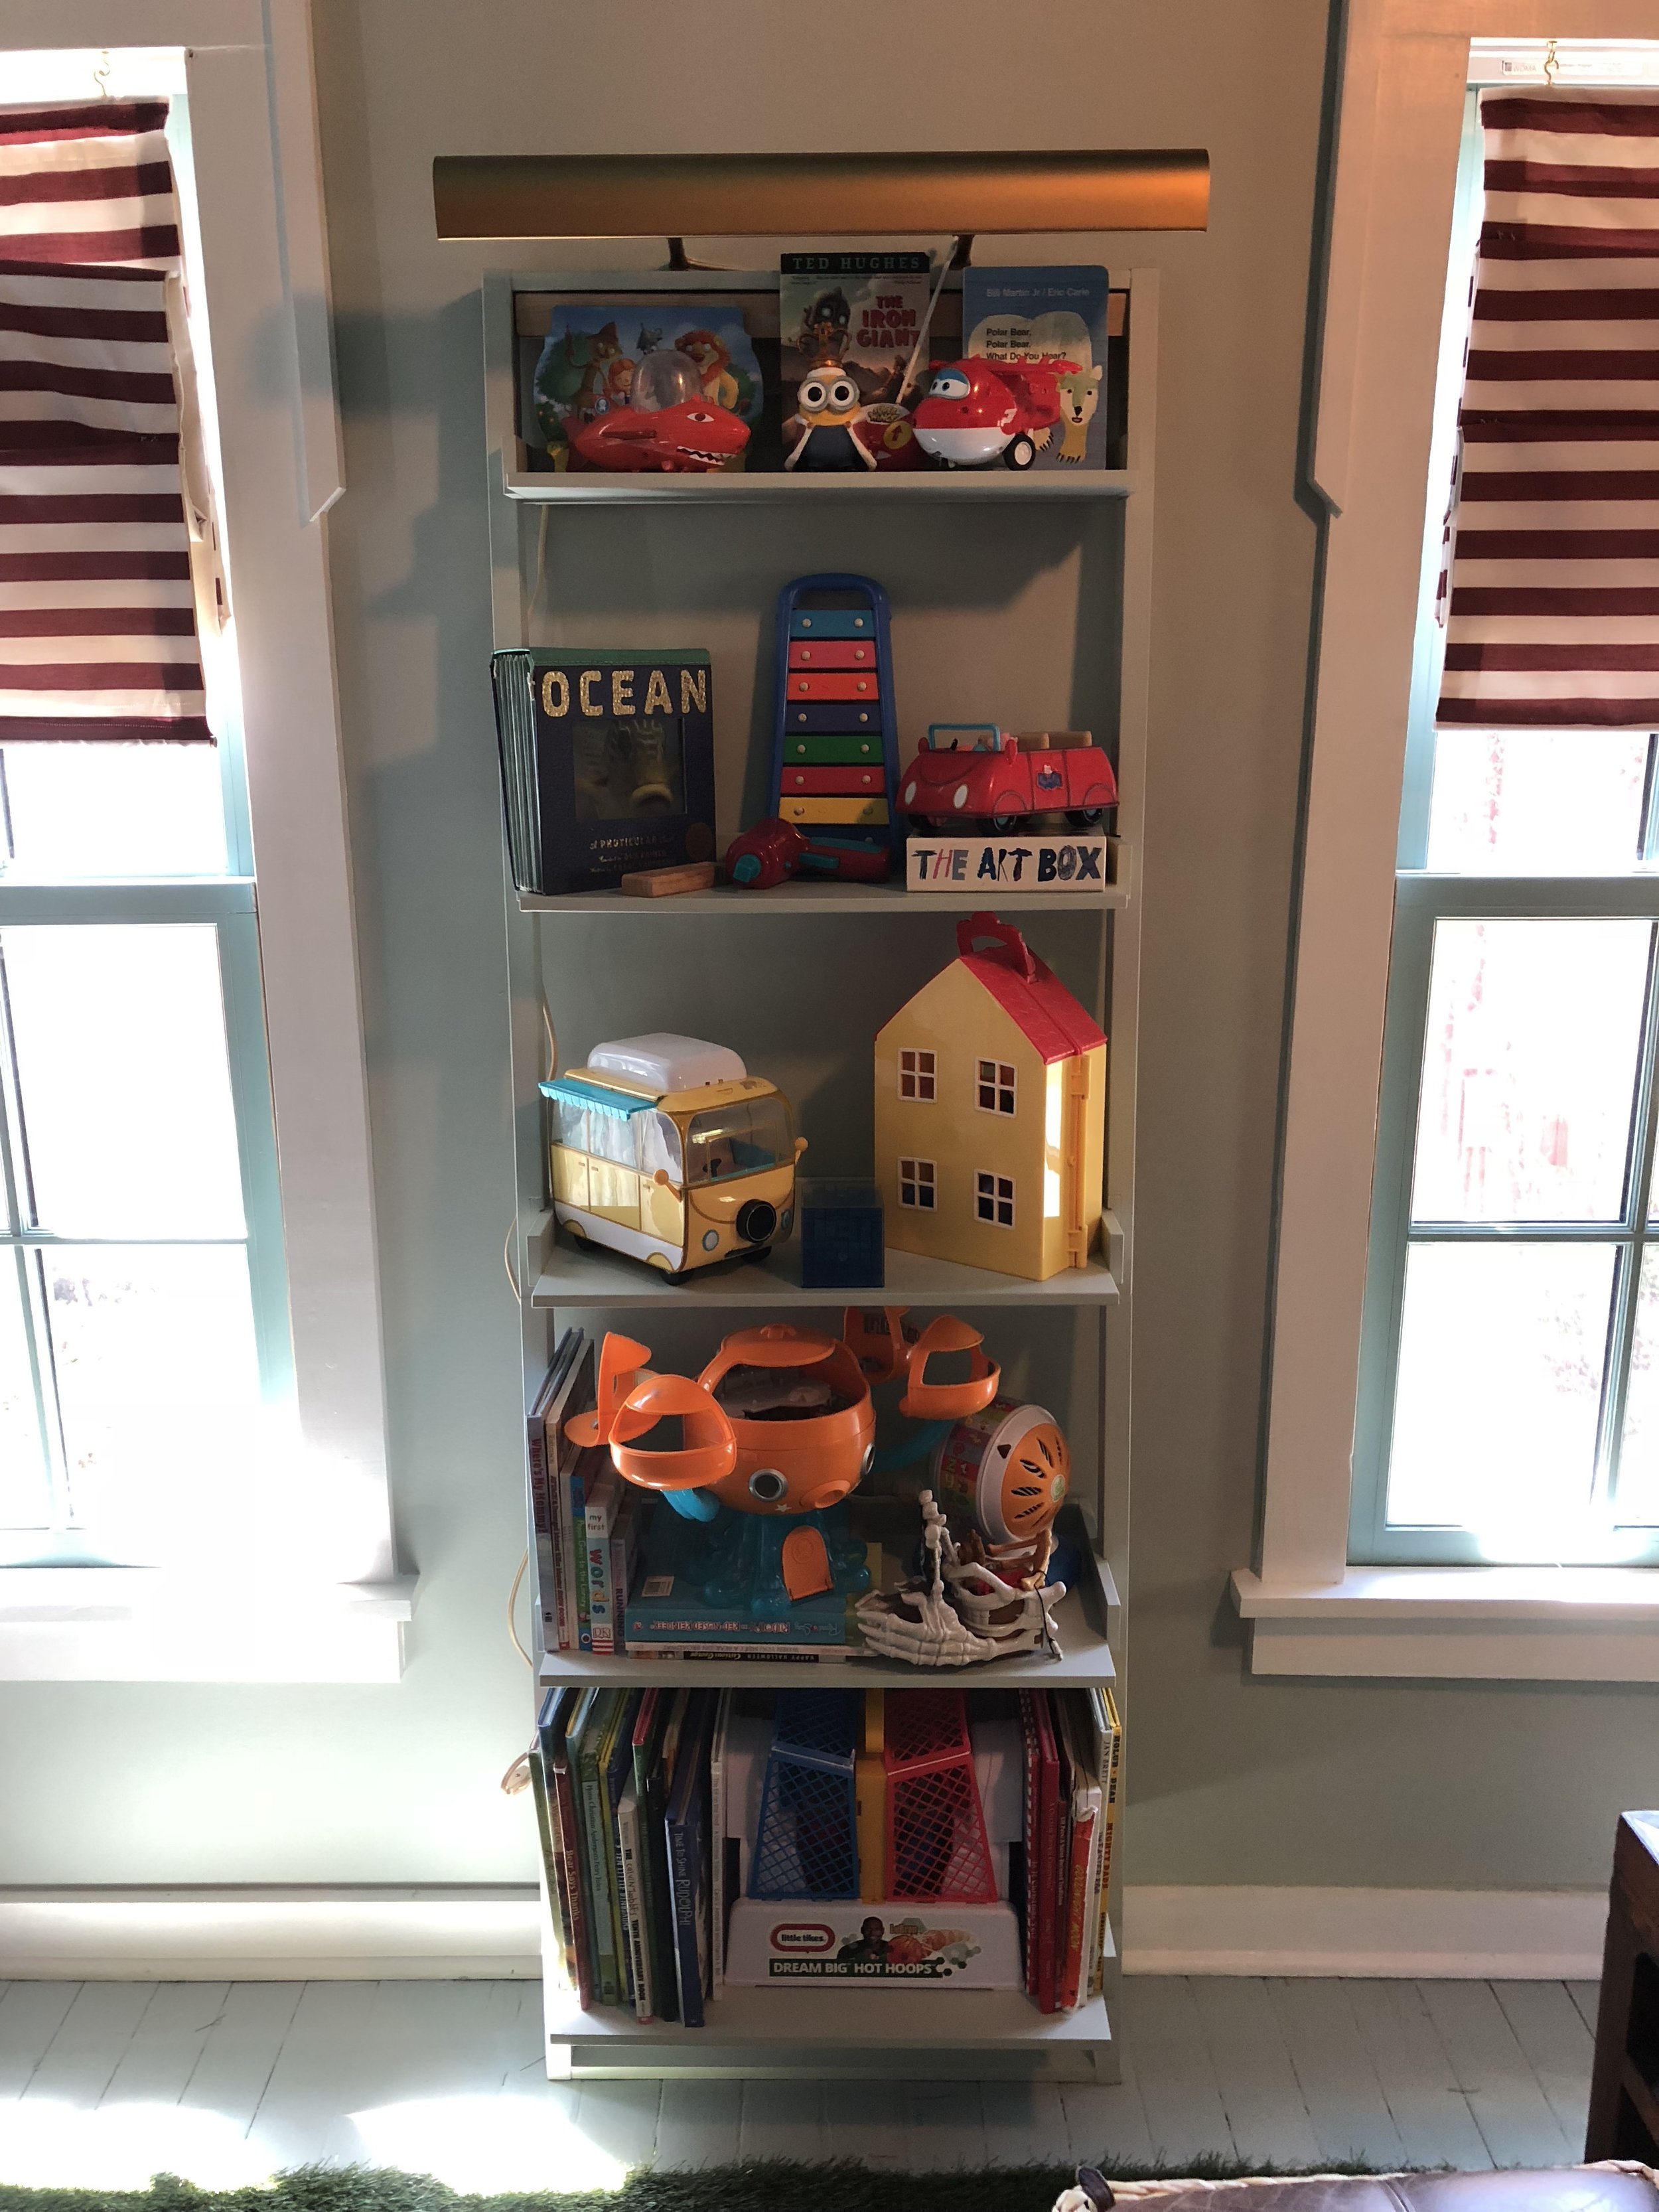
Storage is perhaps the most key when creating a playroom.  You have to keep it accessible to the children, this way they can learn from early on how to pick up after themselves.  This long wall of storage cubbies is perfect for organizing toys and making cleanup fast and easy.  Mismatched and uncategorized toys get thrown into the storage benches out of sight!  The bookshelves have super deep lower shelves for those giant kid books, and the stools in front of the shelves allow the kids to climb up and get what they want down.  I always advocate for the type of shelf that mounts to the wall so there is never a risk of them being toppled by a tiny climber.  

Storage Cubbies 

Storage Cubbies 

3. Imagination Stations

Something that every preschool gets so right is play centers.  They all have a blocks area, a painting area, and several other zones.  This is where you can get really specific to your child's interests.  My kids love playing in costumes.  Additionally one of my son's favorite scenes in a movie ever is where they set up beach tents on Chitty Chitty Bang Bang.  So we decided to make a dress up cabana play area for this playroom.   We also have a table setup for doing puzzles and projects, a long row of cubbies for driving cars along, and an art easel station.  

Dress Up Tent

Dress Up Tent

4. Materials

Keeping a garden theme in mind, we tried to go with wood tones and greens, with reds and oranges for accents.  A soft astroturf rug was cut to fit the space ( you need a thick rug pad for this).  A rug or floor choice in a playroom needs to be chosen based on durability just as much as fun!  This astroturf is super tough and will never show a stain.  Inexpensive fabric was chosen for the window treatments, and the window treatments are made to be inset so nobody is tempted to hang like a monkey from a curtain.  I chose to make them myself with magnetic snaps to create a roman shade function rather than a cord or expensive cordless system.  The fabric for the daybed is incredibly thick, durable, and washable.  The wood table in the center of the room is a 300 year old buddhist prayer table, and it is virtually indestructible! I could do a tap dance on it, in fact, tap dances should be your litmus test for anything you put in a playroom.  

Roman Shade Window Treatment Hack

Roman Shade Window Treatment Hack

Astroturf rug

Astroturf rug

5. Movement

Kids love to move things around!  Big pillows that move and rolling bins are so important for play spaces, because kids need to feel free to transform the space to fit whatever game is going on at the time.  These storage benches are on rollers, and so is the day bed.  They can be moved to create forts, boats, walls, or whatever else the boys are imagining at the time.  Creating a space where they have some control of the arrangement can help them make it their own.  

moving-storage.jpg

Most of all have fun!! Toy are so much fun to look at, let them be out on display.  Think back to your play pretend dreams as a child, and use that.  If you have fun putting it together, then they will have fun playing there!  

bookcase.jpg

Boys Bedroom and Playroom Makeover!

May 11, 2018 Jessica DeBari
Boys Room and Playroom

Boys Room and Playroom

So I had this "if you build it, they will come" vision for this boys room and playroom. They needed to have a place to go to where they could dream.  And just as important was that it had a place for all of their things; so that they were not spread throughout the house anymore! I know it is a trope, but it truly is torture to step on legos strewn across one's living room floor.  So, the older boy is an untidy dreamer, and the bedroom is mostly for him.  He loves pirate ships, rocket ships, hot air balloons, and movies, especially Iron Giant!  We have a lathe and plaster house to deal with, so crack lines form over time, and if you want to properly repair them you need to drill holes every inch along each crack line and use some washers screws and industrial adhesive to reattach it. This is a long hard process that would require an entire blog in and of itself, but long story short we knew we would have to resurface/replaster the whole room once these repairs were made.  Here is a mid process shot: 

Before

Before

And here is the after shot of the boys room mural!

After

After

So a great deal of the inspiration for the mural, which ended up having a dreamy cloud and map like effect, was in fact the destructive process of removing the old loose paint and plaster.  The inspiration for the palette of the bedroom came from a family heirloom, a hand painted and carved bed made by the boys grandmother.  The plaster we used is actually a base plaster, so it is quite rough, and has little flecks of reflective sand in it here and there.  The glaze was mostly translucent, with just a faint bit of paint in it, for another room in the house we used this plaster with only a bit of dirt mixed into a translucent glaze. The painting for the mural was done before the glazing, so that it became very soft and neutral as layers were added over the imagery.  In some places we even sanded back through the mural to let the white of the underneath plaster work within the imagery.  

Below is an image showing the plastering and underpainting

underpainting

underpainting

.  


Below is a close up of the texture with distressing

close up of mural distressing 

close up of mural distressing 

Below is the Iron Giant wall before furniture was moved back in

iron-giant-mural.JPG

Below is a picture of the sweet little rocket ship wall!

spaceship.JPG

Below is the beautiful hand painted bed which inspire the palette

Painted Bed, Palette Inspiration

Painted Bed, Palette Inspiration

Now on to the playroom!!

We decided to try something different for the window treatments in both rooms, and the red mullion color was chosen to help tie in with the red stripe window treatment. The simple stripe pattern is reminiscent of a pirate mate's shirt, and a circus tent, so both great associations for a boy's space.  A clever hack was used to avoid cords and complicated mechanical systems, buttons, magnetic purse buttons to be exact.  They were sewn on at intervals on a clean rectangular light blocking backed panel.  They snap up easily because the magnets are drawn to each other.  So below you can see our super awesome window treatment hack!

Window Treatments: Roman Shade Hack!

IMG_7691.JPG

So we needed storage, and those cheap step ladder shelves that every big box store sells were the perfect size for between the windows, and had a super deep lower shelf for those giant kids books, but we hated the design of them.  So we found some for super cheap second hand, and decided to transform them.  We painted them the wall color, then wrapped them with gold framing strips that we used for framing artwork. Artwork lamps were added to the tops, Et voila! Nothing cheap about the setup, and they are super useful!

shelfalteration.JPG
bookshelves.JPG

Playroom Style Inspiration: Picnic in the Garden

So we had a specific inspiration when designing this room, a picnic in the garden!  We decided to do the astroturf rug before anything else, it just screams run and play on me.  A chill side effect now that it is done is that even I have a desire to hang out in there because the stripes and grass give it a relaxed cabana vibe.  A giant garden painting was integrated into the designs as well.  A good friend bought us the awesome banana leaf storage seats and they are the finishing touch, giving the room a picnic feel.  The table in the center of the room is a three hundred year old buddhist prayer table, doesn't exactly scream kids room to most people, but it is the sturdiest piece of furniture in the house, and its warm age really anchors the space.  

view room to room

view room to room

Garden painting with cubbies for storage underneath

Garden painting with cubbies for storage underneath

We needed dedicated drawing space, and car run along space, hence the chalkboard corner and long line of cubbies underneath the painting.  The cradle is also a hand painted heirloom from their Grandmother, it now holds stuffed animals, and swords, the odd combinations of little boy lives!

Costume cabana, or circus tent!

Costume cabana, or circus tent!

Both boys love playing dress up. So we created this kid sized dressing station, a little rack, with fence posts for sides based on crates for storage, surrounded by a striped tent.  A bonus is that the little corner space behind it is excellent for hiding!

Daybed and Costume Tent

Daybed and Costume Tent

Of course who could do all of that playing without needing a place for a lie down!  This daybed is super comfy and soft with large down cushion pillows.  It also is a trundle bed, with a roll out pop up from underneath it can become a king sized space for sleepovers!

Choosing colors!

Every single color used in both the boys room and play room was custom mixed.  I have a masters in fine art so I can mix like nobody's business!  But for those of you who don't want to custom mix your colors, most of these colors have pretty close matches in the Historical color ranges of the Benjamin Moore color wheel.  

Real Talk About Renovations!

Renovations are hard.  I am going to put a couple of pictures up of the before, and it isn't even going to seem like the same place, because it is not.  The space where the playroom is now was originally an unusable and unsafe porch with plastic broken windows and rotten wood.  Fixing this space into a usable space required us to fully reframe the side of the house, add central heat and air venting, windows, walls, all of it.  There were some major bills, lots of minor nervous breakdowns, disgusting broken nails, scrapes, and paint chips in my eyes.  It was a long and stressful process.

The horror show!

The horror show!

Terrifying!

Terrifying!

But it was all worth it right?!

During this renovation there were many times I thought it was definitely not worth it, like the days I spent scraping the floor on that porch. Or the days we spent knocking out crack lines on the bedroom ceiling, or the ache in my neck after brushing paint into the cracks of the bead board ceiling on the porch over and over again.  

IMG_7115.JPG

Yes of course it was all worth it!  

The first day the boys ran in twirling in wonder at their dreamy room, running and rolling across their astroturf, it was definitely all worth it.  It is the best gift in the world to be able to create a space for them that can inspire and delight.  

And here are some fun pictures! Don't Forget to click on the image to scroll through!

IMG_8416.JPG
IMG_8095.JPG
IMG_7928.JPG
IMG_7874.JPG
IMG_7809.JPG
IMG_7796.JPG
IMG_8006.JPG
IMG_7994.JPG
IMG_8008.JPG
IMG_8092.JPG
IMG_8093.JPG
IMG_7911.jpg
IMG_7836.JPG
IMG_7877.JPG
In kids room Tags playroom, boys room, mural, finish, kids room, play space

Sleeping Porch Makeover!

March 20, 2018 Jessica DeBari
After Pic: Coventry Gray brushed beadboard and China White trim

After Pic: Coventry Gray brushed beadboard and China White trim

A dramatic makeover results in a layered warm feeling nautical bedroom with a breakfast space!

Read more
Tags bedroom, makeover, gray, nautical

Rustic Modern Update

January 2, 2018 Jessica DeBari
Below is the original fan and ceiling, above finished cerused oak beams and brass fixture

Below is the original fan and ceiling, above finished cerused oak beams and brass fixture

A blog post about a full interior renovation. A 90's builder special gets a rustic modern makeover!

Read more
In kitchen

To Finish Or Not To Finish, That Is The Question!

February 16, 2017 Jessica DeBari
Pompeii Wall

Pompeii Wall

  Dozens, maybe even hundreds of talking heads on various home improvement television shows of late are on a mission to tell you not to ever create custom finishes in your home.   This is very direct marketing coming from their advertisers, paint companies, who want you to stick with a straight color and repaint your room with another paint color when you are sick and tired of that color.  It perfectly plays into the American disposable lifestyle alongside Ikea furniture and throw away clothing trends.  This is extremely practical advice if you do not want to raise the bar of your aesthetic aspirations, but let me guarantee you that the deep satisfying ambiance you feel when you walk into a worn frescoed room in an Italian Villa, or a layered glazed and gilt room in a grand chateau in France, is not available straight from a can.  Timeless finishes are what we are talking about.  

If you enjoy dropping, sanding, taping, and repainting your rooms with the same frequency as you change your wardrobe you need not read further.  However, if you would like to create a space that will stand the test of time and trends read on! Timeless finishes do not find themselves tied to the color trends of a decade (we all remember the hunter green and maroon rooms of the early 90's, and the gray rooms of the 2000's will be steered away from for some time).  Instead they are about texture, the human hand, and site specific context.  

Material is king, not color.  Material is what gives us all the feeling that a room has presence of its own.   Try to think of a wall's material in the same way you think of a painting or a sculpture's value.  An oil painting might intrinsically feel more timeless than a watercolor, while a bronze sculpture might feel more important than an aluminum sculpture.  Surface matters.   What materials have been used on walls the longest? If you are thinking plastic based acrylic paints you are wrong.  The first painted walls in Egypt were painted with tinted wax, and it is glorious.  Wax is a luminous, forgiving, and a timeless vehicle for color.   We all know that fresco was a common decorative choice for the Greeks and Italians.  The method of mixing the tempera colors and patterns right into the plaster of the space meant the finished product was always perfectly married to its surroundings. Boiserie ruled in France for many centuries.  These intricately carved wood panels cover a room from floor to ceiling, framing each area of the space to create a harmonious symmetrical perfection.  Boiserie is usually finished in perfectly brushed oils and glazes with a tone which serves to deepen the shadows and highlight its carving. The effect elevates the walls to the point that hanging art on them is almost an insult.  

Glazed, Gilt Boiserie

Glazed, Gilt Boiserie

Application also matters.  Rolling paint onto a wall with a big orange peel roller (industry term for bumpy) is fast and efficient, but the texture it leaves behind is inextricably subconsciously tied in our minds to cheap apartment walls.  We may not notice specifically if there are large drips in the paint of trim work when we walk into a room, but we take in the details nonetheless.  Oil paint applied in long slow purposeful strokes has a calming effect whether it is noticed or not.  It is as if the motion of the application has an echo.  A wall which has been finished in a Venetian plaster leaves behind the strokes of the artisan's blade, and the rhythm of those strokes reverberate and almost create a living heartbeat in the walls.

French Plaster Dirt Glaze Wall

French Plaster Dirt Glaze Wall

 A beautifully finished space has an actual emotional, psychological, maybe even visceral effect.  This is why people pay huge amounts of money to go stay in boutique hotels or old Chateaus.  They pay because beautiful spaces are a salve for the soul. Often the old Italian villas tourists are flooding have simple furniture, nothing to write home about, but still at least made of real wood.   However, the hand plastered walls and artisan made tiles in those villas create an effect that is transportive.  Yes of course if you pay to have a room finished in beautiful boiserie but fill it with crap it will not look right.  But actually the crap will look unworthy of the room.  If you paint a room with a straight out of the can gray and fill it with crap it will look like junk in a dump.  If you paint a room out of the can and buy some nice furniture your room will look nice for a while, and eventually only some of your furniture will look nice.  

Venetian Plaster Polished Wall

Venetian Plaster Polished Wall

So, try this.  Try to reimagine painting a room.  Everyone does the same thing, they walk into a home and go, yuck pea green walls!  I have to paint that immediately.  Instead think, what feel do I want these walls to have? Do I want them to feel soft like the wall of an old stone cottage? Luxurious and sleek like the walls of a penthouse apartment?  Aged but refined like the walls of an Italian villa?  Think about the emotive effect you want the walls to have rather than the color you want them to be.  Then decide what material to use, what sheen, what stroke, then finally, what color!

PS. Wallpaper can be fantastic, if it is handmade. It is all about the hand.

Tags custom finish, interior design advice, art history perspective, color

Wilson Park Fayetteville Kitchen Renovation

February 2, 2017 Jessica DeBari

This was a kitchen renovation on a major budget. We managed it by leaving the existing cabinetry and adding to it instead of starting from scratch. Paint is cheap and can do a great deal to transform a space! Additionally, the appliances were sourced at an extreme discount. We had to drive five hours away to get them, but we saved several thousand dollars doing so! With appliances, marble tile, new 2" butcherblock countertop, and marble island, this kitchen came in at just under 10K! A budget miracle! Here is the stunning before and after evidence:

kitchen-before-after-renovation-remodel-blue

The best thing about this layout is convenience.  All of the pans are right under the stove in deep drawers. Pull out spice racks and oil and vinegar racks are on either side above the stove.  The marble backsplash tile completely covers the wall behind the stove, but only goes up one foot around the backsplash for the counters.  This was a purposeful decision for two reasons. One: completing one row of one-foot tile repeats was very cost effective, and two: leaving a small area of wall for the backsplash allowed us to bring the bright spring green color throughout the kitchen.  

stovetop-spiceracks-marble-backsplash-stainless-steel-hood-cobalt-blue-cabinetry

There was only room for a small kitchen island, but it is maximally useful with a built in cutting board with a hole in its back edge which sweeps straight into the waste bin. I cannot emphasize enough how useful this is, especially for those who chop vegetables everyday!

All the bakeware is in deep drawers under the oven, and the deep pull out pantry to the left of the oven holds a ton of food! Above the pantry is a little door holding a cabinet the perfect size to keep a small liquor collection out of reach of children.  The ceiling is beaverboard, and instead of tearing it down we created a custom metallic finish to make it appear to be a tin ceiling.  The effect is remarkable and nobody has ever suspected that it is not tin since the paint was applied.

stainless-steel-appliances-pull-out-pantry

Overall the project went very quickly.  We found a miller locally who happened to have a couple of weeks free and created the custom add-ons and butcher block to fit.  Because his mill was the source for the material, he was able to do the entire project for less.  We found a local stone countertop maker who sold remnants at a discount, and scored the Carrara marble for the island at the low cost of just $200.  The knobs and pulls were ordered online at a discount.  The overhead light is a mid-century Austrian design, and brings a historical but modern touch.  The countertop tins and wall sign came from a local French antiques spot.  You can afford to splurge on some decorative accents which bring interest and history to a space if you do not bring in too many elements.   The Jasper Conran Wedgewood plates on display above the sink are part of the homeowner's collection and were the palette inspiration for the room.   Ultimately the goal with this kitchen was to increase the storage, update the look, and increase the useful space.  We succeeded beautifully in hitting all of these needs while creating a space that looks as if it was always a part of this 1920's home!

In kitchen Tags kitchen decor, kitchen remodel, kitchen renovation, french tins, green, butcherblock

Styling Shelves

January 22, 2017 Jessica DeBari

Styling shelves is like creating a little art installation.  An overall composition, palette, and narrative must be considered.  Styling a shelf has become a way for individuals to curate their life experience and collections.  There are three rules I try to go by when putting together a bookcase, the first is to consider the colors of my books and objects and how they interact.  The second rule is to vary the scale of my objects greatly, avoiding too many small objects.  The third rule is to vary the texture of the items on display.  

Color, generally if you have brown bookcases you need to search out books with lighter bindings and color.  People often do not have a variety of colors in their books so in this case a great solution is to paint the back wall of your bookcase with a pop of color.  The next aspect of color to consider is to try to bring colors from all areas of the color wheel in, and you can do this without ruining a calm or focused palette by being subtle with those shifts.  You do not have to have a bright yellow object on a shelf next to a red, but you could put something in that is brass or gold to stand in for the yellow end of the spectrum.  You also want to make sure that if you are placing a decorative object on top of a book or in front of a book that they contrast in hue or value.  

Scale is very important.  When you look at a bookshelf with objects and books all of a similar size your brain does not stop to ponder anything, it just says "rows of books" or "shelves full of a bunch of stuff".   A big bright vase and a small sculpture, a big decorative mask and a tiny picture frame, mix it up in scale and each object helps to enhance the importance of the other objects instead of canceling them out.  

Texture is something most people do not consider, but we are all tactile people and whether we consciously think about it or not we do respond to texture.  So make sure to incorporate soft, sharp, shiny, rough and any other textures you can find around your house.  

The most important thing is to have fun!  Go through old shoeboxes, don't be afraid to display a childhood toy, you will be surprised to find you have lived a rich life and already have so many things to display that you had never thought of using before!  Find some old sheet music, frame it and put it on a shelf.  Every time you look at it you will be reminded of childhood piano lessons and the beauty of classical music.  Wonky pottery made in school can be a great reminder of still finding fun in failure.  Just play and you will be very surprised at what you can do!

Powered by Squarespace